TABLE OF CONTENTS
Obtain your Canada Post API Key
- To use Canada Post Autocomplete for Canadian Addresses, you need to get in touch with us at support@sharpxrm.com.
- Once you have obtained the key Canada Post API Key, move on to the next step.
Setup your Canada Post Key application parameter
- In the navigation bar, go to Address Validation -> Settings -> API Configuration.
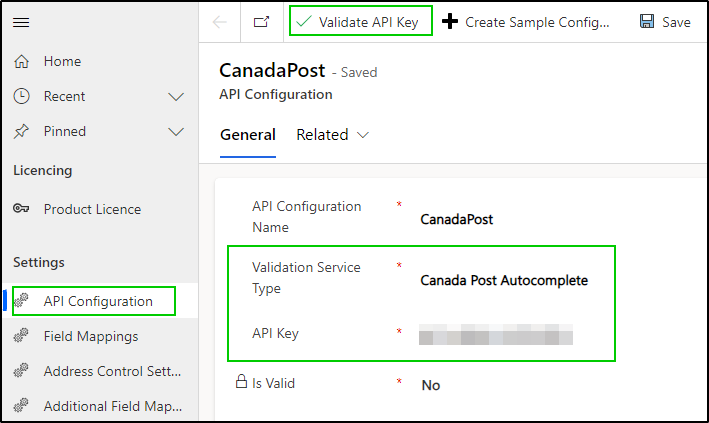
- Create a new record and enter the information as per your configuration.
- Provide the information as follows:
- API Configuration Name: unique name for the configuration. This will be used as an input parameter for the Melissa Express Entry autocomplete control (to tell the control which API key to use)
- Validation Service Type: select the address verification API you want to use : Select the Canada Post Autocomplete
- Service License Key: enter your corresponding API key.
- Is Valid: after the API configuration is created, click the "Validate API Key" button in the command bar. This action will validate the API key in the background to confirm the key is functional. If the API Key is invalid, you will get an error message on the screen and the value will remain No. If it worked, the value will be set to Yes. [Known issue : In some cases, you might get an error message at this step. Please visit this article regarding the issue, including a workaround to continue]

Was this article helpful?
That’s Great!
Thank you for your feedback
Sorry! We couldn't be helpful
Thank you for your feedback
Feedback sent
We appreciate your effort and will try to fix the article